
From Clutter to Control: 5 Ways to Better Manage Email Attachments

We have discussed folder strategies before. We have discussed colour coded emails before. BUT…
We are yet to discuss managing attachments in Outlook. Email attachments often are pushed to the side in the email world, seen as nothing more than basic requirements of business but there are strategies to make the attachment experience MUCH better, in fact, I have five of them. We will discuss each of these five strategies in detail and in order of least impactful to most impactful. The strategies are as follows:
1.) Using the ‘Preview Attachments’ function
2.) Removing attachments from emails after you download them
3.) Setting up ‘Auto-Delete’ and ‘Auto-Archive’ functions
4.) Compressing attachments that you send
And last but certainly not least:
5.) Creating an attachment naming system
These five tips will make sure you will never have to worry about attachments ever again.
So lets begin…
1 | Preview Attachments Function
The first and simplest part of managing our attachments is the preview attachments function. This is automatically enabled in Outlook and helps you avoid downloading attachments unnecessarily. It is as easy as clicking on the attachment and a preview will pop up showing you the contents of it, allowing you to read or print it without needing to download it.
This is a very basic tool and one that most people are aware of but an important one nonetheless. The time and storage savings by not having to download files is a big deal. DO NOT underestimate it. Even if it saves you only 3s of time per attachment and you deal with 50 files a day and only on weekdays, it will save you around 10hrs and 50mins a year. This seems like a small difference, but if you compound it with just 9 other small differences, you have now saved yourself almost THREE full-time working weeks every year.
2 | Removing Attachments
Moving on to something with a little more substance, we have the ‘Remove Attachments’ capability. This feature of Outlook is a nice addition to help us with managing emails, but it’s most powerful nature comes when you combine it with some VBA coding to automate some of this. But first, we will go over what it is, what it does, and why you should care.
The remove attachments feature in Outlook allows you to do exactly as it sounds, remove attachments from emails in your inbox. The reason this feature is interesting however is how you can use it. This feature can be used to effectively make sure that you never run out of space in your inbox ever again. The caveat to this is that you need to make sure you have a good folder system on your device in place to manage and keep track of all the downloaded attachments since they will no longer be accessible from your inbox. There are a few different strategies on how to utilise this depending on how ruthless you are which are listed below:
1.) Remove each attachment as soon as you download it
2.) Remove each attachment after something is resolved
3.) Remove each attachment after a given time period
The first example is true ruthlessness and requires you to make sure all other systems are in place to avoid losing things or making mistakes. The benefit of this strategy however, is that you know that all emails that have attachments remaining are ones that have not been downloaded. This strategy will also maximise your available inbox space. I would not recommend this for legal documents and tax invoices because they require timely attention and tracking but if you are confident in yourself and your system, this is the best option.
The second option represents a more refined solution that is not directly tied to the downloading of the attachment but instead to the process the attachment goes through. The perfect example is an invoice. You receive an invoice for a company and download the invoice. From there, you send it to the accounts team and they organise payment. You then receive a receipt from the original company, marking the end of the invoices journey. Therefore, you would set it up a little automation so that once you get a receipt from a company in reference to an invoice, you remove the invoice attachment from the original email. This is the sort of stuff that is a little more complex to set up but can run in the background and if done correctly is very easy to manage, update or change in the future.
Finally we have the last example. This is actually the one I use the most. The reason for this is simply that it has the ruthless generalisation of the first option but has a bit more of that refined nature with the time component like the second one. This time period does not have to be the same for every attachment. You could have it that all attachments in regards to quarterly reports, sales and financials are removed after 12 months (assuming you have a proper system to track these effectively). Another example would be invoices to customers. If you have a credit policy or payment plan, you can set that they delete after the maximum payment period. There are many other ways you can set this up to be as relaxed or ruthless as you like, but I find most people settle for the broad approach of removing all attachments after 60 days, 90 days, or 365 days.
While the above rules are pretty easy to set up if you know some VBA, creating a tutorial for those who do not know VBA is a bit beyond the reach of this post and would instead be its own post entirely.
3 | Auto Delete & Auto Archive
Following the ‘Remove Attachments’ function, we have a more simple strategy for dealing with attachments (and excess emails), auto-delete and auto-archive. The Auto-Archive function is more practical than the Auto-Delete function due to still having the ability to access the emails afterwards, but both can be utilised depending on your goals and type of business. While these do not target attachments directly, they can be a great way to manage the size of your inbox.
The way Auto-Archive works is by allowing you to designate a folder on your device where old emails get sent to in the form of an Outlook archive file. This file can be viewed using Outlook and will appear like any other normal inbox folder when opened. The emails in this folder are now no longer part of your inbox and are only stored on your local device saving you a lot of space and can help speed up searching for emails. However, because these emails are now only stored on your local device, make sure to back them up regularly to avoid losing them when things go wrong.
But how do I set this up?
Setting up Auto-Archive or Auto-Delete is actually more confusing then it should be so let me go through the steps to get this done.
The default ‘archive’ button you see in Outlook, found either in the tool bar or in your ‘mailbox settings’, does NOT clear your inbox from these emails. This archive button instead, just allocates a folder in your inbox for emails to go to when you press ‘Archive’. We do not want this.
Instead we are looking for the actual Auto-Archive setting. To get there, we have to follow these steps in order:
1.) Click on ‘File’ at the top left of Outlook
2.) Find the small ‘Options’ button down in the bottom left and click on that
3.) Navigate to the ‘Advanced’ section from the ribbon on the left
4.) Find the ‘Auto-Archive’ portion and click ‘Auto-Archive Settings’
Now that we are here, you have the ability to choose how frequently the Auto-Archive takes places along with how old the emails have to be for them to be archived. Additionally, you will also have the ability to either select a folder on your device for them to be archived to or set it that they are deleted instead.
The details of this will be discussed in a later post about managing email volume. For now, just remember to be practical about how often the Auto-Archive function runs and how long before an email gets archived.
4 | Compressing Attachments
Now we are starting to get into the more juicy strategies with these last two. This one is probably the highest ROI on your time and effort given how easy it is and how big the difference is. It is a basic one but can make a MASSIVE difference to small and medium businesses. Having smaller attachments not only means less storage demand, but it means a better experience for the clients you work with. I STILL… even with today’s endless storage available, regularly see company inboxes almost maxed out on storage, and STILL… even with today’s super fast internet, regularly have to wait an extra few seconds for an attachment to download. But I get it, compressing every single attachment before uploading sucks… It is tedious and feels like a waste of time. So let me teach you a hack that will make this 100x easier… NXPowerLite!
This little add-on will revolutionise your email attachment game! What it will do is automatically compress any attachment you ever send. No more will you ever have to about attachment size. As soon as you press send, NXPowerLite will AUTOMATICALLY compress any attachments you have; whether it is a PDF, Powerpoint presentation, Word document, PNG or JPG file, Excel document or any other common file type. There is no sponsorship or affiliate deal going on here. I am just a big fan of this undderated piece of software.
5 | Attachment Naming System
Now onto the finale, the attachment naming system. This one is a sneaky one because it seems simple on the surface but will change how you view managing attachments entirely.
I see it all the time… emails popping up in my inbox with some PDF attachment, but when I look at the attachment, it ends up being titled something like ‘fgp_15032024-TUIHN invoice copy’. How on earth am I meant to know what this file is unless the sender has made it clear in their email; but then after I download it, I no longer have this context. So unless I then rename it, I will NEVER be able to find this file again. Don’t be like this, we can do better.
The Who:
The first part of your naming system is the ‘who’. Make sure that when you name your attachments, you are able to identify who it is from, who it is for, or who made it. Which one of these you use depends on what you plan to do with them and where the attachments came from originally; see below:
Who it is from = Think sending a file from one company to another company
Who it is for = Think sending credits, invoices, contracts, etc.
Who made it = Think sending designs or marketing material within your company
This part of the naming system will make it incredibly easy to find these files and their email threads, and will make your emails feel just a touch more professional, but there is more…
To make it clearer, let’s go over the three options in more detail.
For ‘who it is from’, I most often see it used as a way to advise generally where the file originated from. This is helpful when you are sending files between contacts, not only making these messy interactions easier to track for you, but also making it easier to track for those you plan to send it to.
For ‘who it is for’, this is used when important information is being shared by you and stops at the receiver, like an invoice for example. This has some crossover with the first category, since putting your business name in the file will be useful to the other party in keeping track of their invoices, but only helps them. We need something on our end as well. This is where we would put the receiving company’s name in the title allowing us to track these invoices on our end.
And lastly, ‘who made it’. This one is a bit more unique but definitely has its use cases. The best way I can describe the use for this one is when you are providing some sort of reference material, whether you are providing a resource to another company, or if you are sharing a piece of design work within the company. Having who specifically made it in the attachment name will mean that you can easily locate all of this person’s work that has been sent via email, and allows the receivers of said attachments to easily identify who’s work it is beyond the company that provided it like in the ‘who it is from’ section.
The What:
This part is exactly what it sounds like. It makes sure it is clear WHAT the file is. People get lazy with this part… Welll… People get lazy with all of the parts, but people get ESPECIALLY lazy with this part. ‘The what’ is the most important part of all this once we get to the end and bring it all together. I will address that soon.
For ‘the what’; we are wanting categories, not specifics. The specifics are covered by ‘the who’ section mentioned previously, and ‘the when’ section that is coming up. In ‘the what’, it should be PREFEREABLY identical to whatever category folders you have, whether that is implemented in the ‘Action Orientated Sorting’ or ‘Category Orientated Sorting’ method. The reason will become clear later, but what we are doing here is making it easy to track what type of attachment we have provided. Most people I see already do this for something like an invoice, but they do not always do this with stuff like presentations or employee ID pictures, etc.
The When:
Finally we have the when. The strategy here is to track the timeline of attachments: the date the file was created, the date it was sent, or the time period the attachment represents. We will use these three in different scenarios, as seen below:
When it was sent = Think legal documents and contracts
When it was created = Think invoices, receipts and tax documents
When does this attachment matter = Think reports, monthly sales figures and regular announcements
The importance of the ‘when’ comes into play when we are trying to manage timelines and create a clear paper trail of documents. As an example for ‘when it was sent’, lets say you get into a legal dispute with one of your suppliers. They claim that you took too long to send the contract, so the terms are no longer satisfactory meaning they refuse to sign. In this case, naming the attachment with the date it was sent is an easy way to keep a digital paper trail beyond just when the email was sent, building a legal safe guard through redundancy. It is a small change, but a helpful one. Therefore, in the above situation you could pull up the file, compare when it was made with the name used for it, then matching it up to the email you sent and its attachment, you could then be 100% sure of the timeframe from when the contract was made to when it was sent.
The second way of using ‘when’ is ‘when it was created’. I use this one to track important documents that need storing. As an example, most people need to keep receipts for tax reasons, putting the date it was made into the name of the file makes this much easier.
Lastly we have ‘when does this attachment matter’. This use case is less for tracking timelines of a specific file or keeping track of particular documents, but to log a history of stuff. For this example, think of a regularly released announcement like a monthly customer stories newsletter. There would be no reason to use a specific date in the name of the file since it represents the whole month, but titling it ‘This month’s customer stories’ would make it impossible to locate the particular newsletter in the future. Now… I know most people already do this, but that does not mean this is not worth mentioning: put the month and year into the name of the file, e.g. “January 2025’s Customer Stories”. This makes sure that at any point in time, you or any of the people that receive this newsletter can instantly find an issue from a particular time.
There is one final part of this equation to create your naming system and that is how to format it. Then we can finally talk about my secret tip that pull all of this together.
The Format:
This is where we pull all of the above together and make a coherent file naming system to make sure everything is perfectly consistent and easy to manage and track. To do this, I find that the ordering should be optimised for readability and understanding for both the sender and receiver of the attachment. The ordering when doing this however can vary a lot depending on what the file is being used for and in what context. Therefore it becomes far more practical as a business owner to not over optimise and just make sure that you use the same ordering for everything and that the who, what and when is always included. This way the consistency itself will make it understandable and highly readable. As both you and the people you send to slowly become more exposed to the system, the naming will become more recognisable and easier to understand.
THE SECRET:
I have not seen many people mention this but once I reveal it, it will enlighten you to as to why the attachment naming system is so powerful. The secret sauce I have is… that Outlook lets you create inbox rules based on properties of attachments in emails. You may be thinking, “So what?” or “Why are attachment properties a big deal?”, so let me elaborate…
If you use the who, what, when framework I have outlined above, you can set any number of rules to sort emails you send based on this naming system you have created. Including what the attachment is about, what financial year it relates to, who made it and any combination of the above. As an example, you could very easily set up a rule to forward all emails that have an attachment that includes: “company 1”, “2025” and “invoice” in its title to your accounts team.
Don’t let the work scare you though, with a little bit of elbow grease to figure out your own naming system and rules, you will never have to manually sort emails that have attachments ever again.
Best of luck with your inboxing journey, and lets organise!
Cheers, Nathan.
How colour coding emails makes you more money!
In Outlook, you can colour code emails using a feature called categories. Many of us have overlooked this functionality in the past, so much so that Microsoft has almost entirely removed it from their ‘New Outlook’. Luckily though, we can still access most of the categories feature within ‘Outlook Classic’.
So why does this underrated feature make us more money as a business?
The Answer? Follow Up
But that is not why you are here, you want to know the how, and THAT is what this post is about. Welcome to how to use categories in Outlook Classic to make more money for your business. A follow up to my first post on how to organise your email’s folder structure.
Why use Categories?
‘If we already have a good folder system for our inbox, why would we even need to colour code our emails?’ is a question I hear regularly. The reason is clutter. You need to think of categories as universal folders that do not require navigating to but can be displayed anywhere. Categories can take the place of additional sub-folders that would, if implemented, unneccessarily obfuscate and segregate the view of your inbox.
Lets say you sort your emails by priority but you are already two folders deep with a main folder for ‘Review’ items, and then another sub-folder for ‘Invoices’ that are to be reviewed. You could in theory further delineate the high and low priority invoices into even more sub-folders labelled as ‘High Priority’ and ‘Low Priority’, but not only would that add yet another layer of complexity to the folder system and make it harder to navigate, but now you can now only see one priority level of invoices at a time; not a great solution.
Instead if you were to use categories, you could mark ‘High Priority’ emails as a red colour and ‘Low Priority’ emails with a yellow colour. With this solution, you can still delineate which invoices are the most important while being able to see all the invoices at once, and have an easier time navigating your inbox. That sounds like a win, win, win to me.
Now… You may be thinking, ‘Don’t most email providers have an option to select if an email is high or low priority?’. Yes, you are correct, but this is on the sender’s end, not the receiver’s end. If you want to mark an email as low priority after receiving it, unless you have a custom application for your email and are not using the standard ones, that is not something you can do.
This however, is just the introduction to explain the key differences between folders and categories, we are still yet to show the money making power of this feature!
How Can Categories can help you?
If life and business was easy, follow up work would not exist. We would not have to chase invoices or credits, or have to constantly check in with contractors and their progress, or have to remind employees about meetings and events, etc. Follow up work never ends and eats into your time as a business owner. But what if you didn’t do it? If you decided not to follow up or you forgot to, it is one of the fastest way to lose money in your business since invoices will not be paid, you will not get money back for credits, work that was meant to take three months takes six, etc. So what is the solution? Categories AGAIN!
While Outlook and many other email providers offer an actual ‘Follow Up’ feature that we could use to flag emails for follow up, it offers very little of the nuance that a real business needs; the type of nuance that the categories feature is capable of. The way categories achieves this level of nuance is by having a multitude of different categories available to you, that can all be used for unique purposes and applied at the same time as each other for even further depth. Let’s discuss some of the options available.
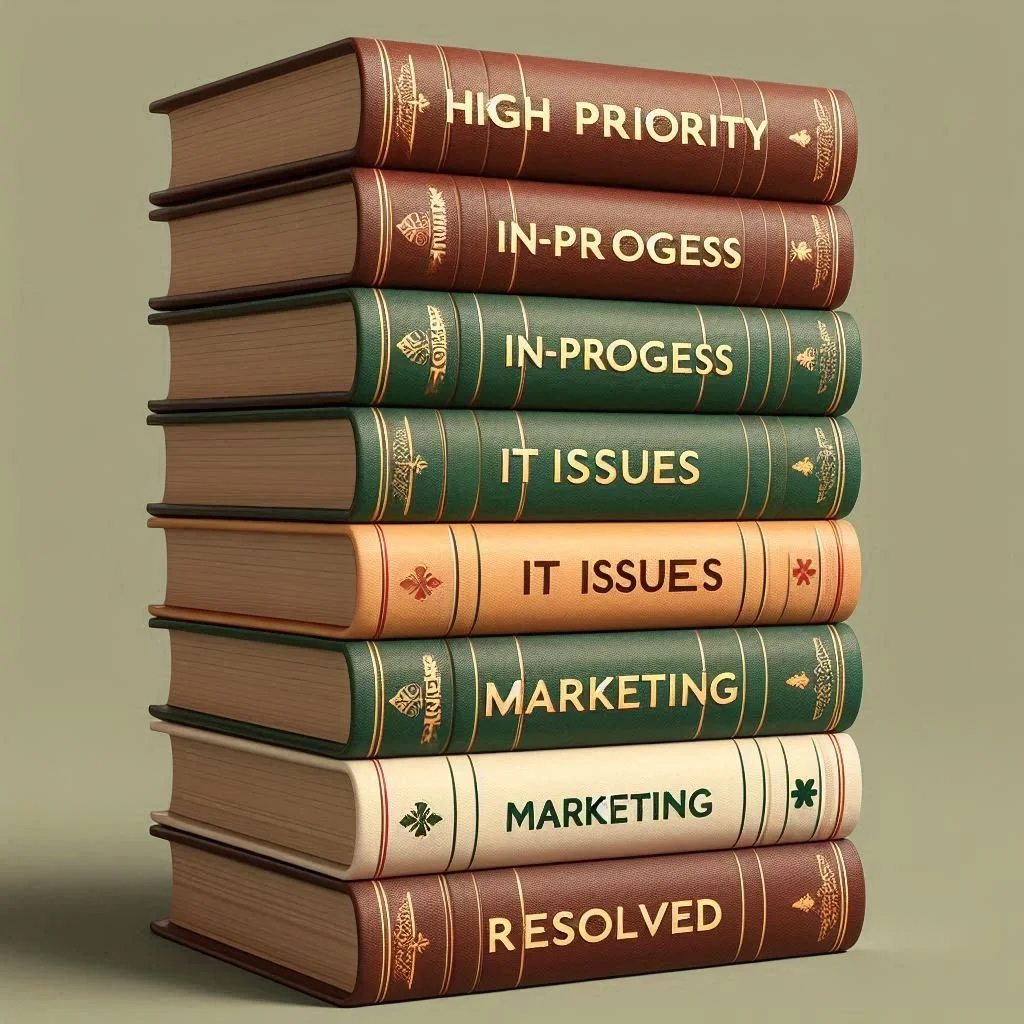
Unresolved, In-Progress and Resolved:
This is the most common use for colour coded categories I see. Both because it can be used universally across a whole host of email types and because it is simple and useful. The idea behind this strategy is to create a simple way at a glance to tell if something has been dealt with or not.
This could be team related, allowing people from within a team know what has and has not been done, with the in-progress representing that someone has started working on it. It could also be used when dealing with customer complaints or supplier issues. In this version, ‘Unresolved’ would represent an email that has not been responded to by the other party. The reason I use that language specifically, is often times you may need to follow up more than once to get responses, and which case this would not be ‘In-progress’ and depending on the email require more or less attention than an email that has received a response. ‘In-Progress’ would represent an engagement with the other party but no finalised solution. And finally ‘Resolved’ would be once an email thread is complete an a resolution has been found.
The standard colour set up for this is the classic: Red, Yellow and Green. If you are using ‘High Priority’ and ‘Low Priority’ this may get confusing however. There are two options to resolve this:
1.) You create multiple different categories for the same colour that use a different name (yes you can actually do this)
2.) You use alternate colours for one of them so they do not contradict.
For me, I prefer doing option two and setting my Unresolved, In-Progress, and Resolved categories, to Purple, Orange and Green respectively. Initially it will take some time to get used to since everyone is used to the traffic light system, but it will not take you long to adjust. The reason I don’t change the High and Low Priority categories, is because red represents urgency and impulse which is exactly what High Priority is. Its the same reason why notifications for any social media platform uses red.
This strategy is another simple use for categories but builds on the framework of our folder systems and other category implementations.
So now just looking at one folder; you will be able to focus exclusively on invoices that need reviewing and see immediately which ones are high or low priority and know exactly what stage of completion they are in, all without adding any additional clutter to your inbox.
Email Type Categories:
If you chose the ‘Action Orientated Sorting’ folder system from my first post, this is an option to add clarity to what emails are coming through your feed. This is a simple use case, but a great one to create clear visual cues for which emails are which type.
While you can use any colour system you wish, these are some starting options for you I see commonly:
Blue: Invoices or IT issues
Orange: Marketing emails or announcements
Grey: Accounting, Tax or Admin
Green: Payments or Credits
Purple: Contracts, Offers or Opportunities
There will be more to add to this post, but for now I wanted to get this out and available.
Best of luck with your inboxing journey, and lets organise!
Cheers,
Nathan.
The 2 best ways I set up folders in Outlook
Learn how to best set up your folders to never have emails get in your way again.

Have you had that feeling of being constantly overwhelmed when looking at your emails? I certainly have! So I am going to show you how to get rid of that feeling and stop emails getting in the way of everything with 2 simple folder setup strategies.
We will start basic and discuss how your main folders should be organised. These will be the lifeblood of how you organise everything. Then further in, we will discuss how to lay out the sub-folders within that.
So lets begin…
Folder Design | Main Folders
Your main folders are the first step into cleaning up your inbox. These folders should be very basic and be the backbone of your email system. Main folders should be formatted in one of two distinct ways to make sure they are both easy to understand and effective at accomplishing our goal. These two ways are as follows:
1.) Action Orientated Sorting
2.) Category Orientated Sorting
We will go through what Action Orientated Sorting is first and then we will dive into my favourite, Category Orientated Sorting.
Action Orientated Sorting:
This where you set up your main folders based on what you plan to do with the emails. Email Items will not be set up in folders under different supplier names, or categorised as something like ‘Invoices’. This set up is a bit unique, but that is because they will be focused on ACTION.
For example:
Read Only = Emails that do not need a response and are exclusively for the reading and storing of information
Downloads = Emails that involve downloading attachments (think designs, invoices, spreadsheets, etc)
Follow Up = Emails that need to be revisited in the future to check in with the receiver/sender
Review = Emails that contain details that require reviewing (think tasks to be done, contracts to sign, etc)
You can set these up however you like, but the goal here is that the folders must be categorised in a way that represents what you will do when you see them. The benefits to this are that, in any given folder you know exactly what style of email you will find and you will be able to batch email tasks together based on this. The negatives to this however is that looking for specific companies, contacts or categories of items forces you to either search for them or create additional sub-folders.
This set up is particularly good if all emails in a given mail folder are of the same or similar action priority. For example, If you get 50-100 invoices a day from customers, along with 50-100 sales enquires a day from customers, and a whole host of service contracts to review every day for said customers but no customer is more important than the other and you serve a market where no customer requires quicker processing than another, you would benefit from this strategy because each folder will represent certain actions that need to be done. Not only keeping track of where you are in your workload but allowing for the time blocking of these tasks to make things more efficient.
Where this set up fails however is when you have a highly variable business that has many different levels of priorities for the same types of action items. This is where Category Orientated Sorting can often be a benefit which we will discuss now.
Category Orientated Sorting:
In opposition to Action Orientated Sorting, this strategy changes the focus towards what your priorities are, not what actions you need to take. These main folders will be built around what you focus on.
For example:
Customers = All emails, whether its enquiries, payments, contracts, etc that are from customers or potential customers
Admin = Employee payroll, employee contracts, communication with suppliers, etc.
Business = regulation and licencing, potential business opportunities, etc.
Suppliers = Every supplier your business uses in one spot, all their tracking emails, payments and invoices, product line changes, etc.
This model is far harder to provide generic examples as it depends on every business and is exactly why it works so well for businesses that have multiple changing priority levels. The aim for these folders is that they should NOT be specific, like a folder for a certain customer for example. Doing this would make the inbox far too hard to navigate and make it a nightmare to manage and adjust in the future. The folders should be generic, cover-all categories, that have clearly defined meanings and differences between each other so that they can be used as sorting buckets.
The benefits of this structure is that it can be designed in a way that targets where your email demand comes from opposed to what email demand you get while also providing easy to navigate folders that people outside of those that do email in company can understand.
The negative to this however is that it makes it harder to batch certain tasks together and same for the negative in Action Orientated Sorting, you will either need to search for the emails or create additional sub-folders.
Folder Design | Sub-folders
Now that you have picked your folder sorting system, we must now layout how we set up the sub-folders in this system. It once again depends on the framework your have chosen for your main folders and we will go through both.
Action Orientated Sorting:
Since you have already sorted by the action you plan to take, from here we set up sub-folders to differentiate emails by their category and source so that everything is easily accessible. For the sake of clarity we will define these.
Category = What is the email about
Source = Who has sent the email
Which of these two that should be focused on will be determined by your business size. For a small to medium business, it is often easier and more efficient to have these sub-folders sorted by the source. If you are a larger business however, you might struggle to track everything and what you need to attend to, in which case category should be the focus.
Example 1 (small to medium business):
Main - Read Only
Secondary - Company 1
Tertiary - Announcements
You may only have 5 companies that send you read only announcements, so sorting by source means at any given time you can see if a company has sent out a new announcement that is relevant to you. Then, you can do secondary sorting via priority if neccessary. It may be unneccessary for your business but once again it depends on the importance of everything.
If some read only emails from a company requires immediate reading, having a tertiary folder can help separate these from the rest of the read only emails from them. An example would be if you have outsourced your IT department and you need to be notified about outages, problems with your website, customer information breaches, etc.
Example 2 (larger business):
Main - Read Only
Secondary - Announcements
Tertiary - Company 1
The difference here seems small, but if your scale of business operations is much larger, having 100 sub-folders for each company can be excessive and should be avoided where possible. And with scale, will also come a larger volume of emails which if separated by company can become very easy to lose track of and miss critical emails that needed urgent attention.
in this set up, all read only emails that are in the form of an announcement are automatically placed into the secondary ‘Announcements’ folder, not into the tertiary company folder. The reason for this is as mentioned before, volume is just too high to make this work. Instead, you move the email to its designated company once it has been dealt with. This way, all unread announcements have their own folder and will not be lost due to the incoming volume. Then, once it is dealt with, it can still be sorted to its tertiary company folder so you can maintain a history of all important emails for a given company.
This strategy does fall victim to a lack of priority between sources but helps manage larger volumes of emails in the inbox easier.
In both of these strategies, emails of one type are easily located and actioned but at the sacrifice of being more indescriminate in regards to priority and what the email is actually for. If this is important to how you do emails, the category orientated sorting and its subsequent sub-folders will be a better fit as we will discuss in the coming section.
Category Orientated Sorting:
This section will discuss how we should layout sub-folders under the Category Orientated Sorting system. The set-up style can be repeated from the Action Orientated Sorting section with similar results with the caveat being that Category Orientated Sorting has a larger threshold for company size before you are forced to sort by priority first. The reason for this is because you are already sorting by categories and often any given contact will only fall into one category bucket. Contacts will occasionally fall into multiple buckets, but this is rare and often not a concern when you take into account the below.
The benefit of Category Orientated Sorting that we will address here that Action Orientated Sorting can often struggle with is that many times you do not need to sort by company or priority and can instead further sort incoming emails by sub-categories and then use colour coded tags (we will discuss this in another post) to determine progress, source and priority.
For Example:
Main - Invoices
Secondary - Unpaid Invoices
Secondary - Paid Invoices
Whether we like it or not, invoices need to be paid, no matter which company they are from. So a main folder for invoices makes sense; however, we should have a set up to know if they have been paid or not. In this case, we split the folder into two separate folders. When invoices come into the inbox, they are automatically allocated to the main invoices folder, then upon viewing them, if they are not paid, will be moved to the unpaid invoices sub-folder.
This now is a great way to keep track of new invoices, unpaid invoices and paid invoices from all companies very easily. This is the main benefit of Category Orientated Sorting. We will discuss the automations and colour coding in another post, but this set up still works if you employ it manually and you are diligent.
Closing Remarks
These folder systems can get infinitely more complex from here and can allow you to (with the power of VBA and some custom inbox rules) to dictate EXACTLY how you want your inbox to appear. This can feel empowering, but it is important to remember it is easy to over optimise. Making things perfect often means other areas suffer to achieve this result.
As an example, you could achieve a perfectly divided list of company folders in every action folder you have. This will mean you will always be able to instantly find any company’s emails when searching for them. But, this will come at the sacrifice of your inbox being a nightmare to navigate, manage and track. A balance must be struck between ease of access/tracking and adequate sorting. This balance will depend on your personal temperament, your goals, the size of your business, the number of employees you have, what industry you are in, etc.
This can be hard, and reverting changes to how your inbox is layed out after the fact can be a real pain so it is important to spend a bit of time planning what your dream inbox will look like and what compromises you are willing to make to have it happen.
Best of luck with your inboxing journey, and lets organise!
Cheers,
Nathan.